Categories
Inspiration Lifestyle

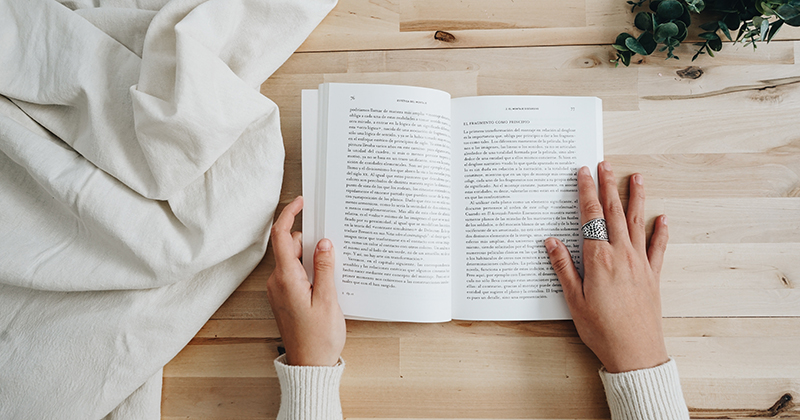
12 Books That Will Change Your Life Forever

Books are powerful things, aren’t they? Are you looking for books that will change your life? Are you wanting to get leverage on yourself, and make real changes, but you’d love a guide to assist you?

Here are some books that I really think can help improve and change your future. Each one conveys a powerful message in its own way that can touch the reader’s life and make it better.

So whether you’re just looking to change your life or just looking for something to read on your downtime I highly recommend the following books.

kindle

Kindle Paperwhite Essentials Bundle including Kindle Paperwhite – Wifi, Ad-Supported, Amazon Leather Cover, and Power Adapter.

SEE ON AMAZON

1. Meditations (Penguin Classics)

Author: Marcus Aurelius
Translator: Martin Hammond

A leading translation of Stoic philosophy in wise and practical aphorisms that have inspired Bill Clinton, Ryan Holiday, Anna Kendrick and many more.

2. Rich Dad Poor Dad

Robert T. Kiyosaki (Author)

I never understood how wealth worked. This book completely changed the way I think about money and creating wealth.

3. Down and Out in Paris and London

George Orwell (Author)

Orwell is known for his scary dystopian masterpiece, 1984, and his political commentary, Animal Farm, but his nonfiction is where all the life lessons are. Down and Out is a great story about his life in poverty, how he learned to cope with a world crumbling around him, and how he worked to get himself out of it. A powerful and encouraging read.

4. Man’s Search For Meaning

Victor E.Frankl (Author)

Viktor Frankl, an Austrian Jew, studied neurology and psychiatry with a focus on depression and suicide years before being deported by the Nazis in 1942. He defied odds by lasting three years in concentration camps. He wondered why did some survive and others perish? What gave people the will to live? What gives life meaning?

There are so many little nuggets of gold in this book that just sit with you long after you’ve finished reading. It’s a short read and not as grim as the description would have you believe.

5. Girls to the Front

Sara Marcus (Author)

Whether you’re a punk or not, this is a great book about the origin of a movement called Riot Grrrl and the impact it had on music and feminism. It showcases some of the upsides and downsides to early ’90s feminism, and also illustrates just how influential these female punk bands were for the future of music.

6. Love, Freedom, Aloneness

Osho Osho (Author)

Osho, one of the greatest spiritual thinkers of the twentieth century, explores the connections between ourselves and others in Love, Freedom, and Aloneness: The Koan of Relationships.

In today’s world, freedom is our basic condition, and until we learn to live with that freedom, and learn to live by ourselves and with ourselves, we are denying ourselves the possibility of finding love and happiness with someone else.

7. The Alchemist

Paulo Coelho (Author)

An easy to read, highly descriptive, story that teaches a powerful metaphor – how to pursue your dreams.  Learn the obstacles that will arise, and learn how to channel your courage on the path of what you value most.

8. Les Misérables

Victor Hugo (Author)

This story was incredibly powerful when it was first published over a century ago, and it still has that power today. It shows how working with everyone, whether impoverished or not, is the best goal for any life. Hugo also shows the importance of forgiveness and illustrates that humans are just plain complicated.

9. You Are a Badass

Jen Sincero (Author)

In this refreshingly entertaining how-to guide, bestselling author and world-traveling success coach, Jen Sincero, serves up 27 bitesized chapters full of hilariously inspiring stories, sage advice, easy exercises, and the occasional swear word, helping you to: Identify and change the self-sabotaging beliefs and behaviors that stop you from getting what you want, Create a life you totally love. And create it NOW, Make some damn money already. The kind you’ve never made before.

By the end of You Are a Badass, you’ll understand why you are how you are, how to love what you can’t change, how to change what you don’t love, and how to use The Force to kick some serious ass.

10. The Lord of the Rings

J.R.R. Tolkien (Author)

Some obstacles are easy to overcome, and others require you to push through some of the hardest parts of your life. The Lord of the Rings is a great example of what to do when you’re faced with a seemingly impossible challenge. Sure, it’s fantasy, but that doesn’t mean you can’t gain inspiration and encouragement to make some amazing improvements for your future.

11. Quiet

Susan Cain (Author)

Being an introvert in an extroverted world can absolutely be difficult. Cain discusses what introversion really is, why people are introverted, and how they survive in an extrovert-dominated world. This is excellent reading for anyone, introvert or extrovert.

12. The 7 Habits of Highly Effective People

Stephen R. Covey (Author)

“Every so often a book comes along that not only alters the lives of readers but leaves an imprint on the culture itself. The 7 Habits is one of those books.” —Daniel Pink, New York Times bestselling author of When and Drive

One of the most inspiring and impactful books ever written, The 7 Habits of Highly Effective People has captivated readers for 25 years. It has transformed the lives of presidents and CEOs, educators and parents—in short, millions of people of all ages and occupations across the world. This twenty-fifth anniversary edition of Stephen Covey’s cherished classic commemorates his timeless wisdom, and encourages us to live a life of great and enduring purpose.

Categories
DIY Lifestyle

Christmas Crafts That You Need To do

To celebrate Christmas, we can diy some crafts. Follow me, here are the most comprehensive collection of diy tutorials. After completing the tutorial, you can make beautiful Christmas Crafts.

Image by Gabby K on Pexels 

Christmas crafts tutorial (Complete guide)

DIY Christmas Wreath

Looking to decorate this Christmas with a grapevine wreath? Nothing delights the senses like natural elements. Mother Nature always has a way of making us feel inspired and wowed at the same time. This Christmas wreath to make your home ultra cool. It is simple so you won’t have a hard time even if you are an amateur. Even if you’ve never made a wreath in your life, you’ll find the process easy.

https://www.thevoguetrends.com/wp-content/uploads/2020/11/1544149071.mp4

Step 1: Supplies

  • Grapevine wreath of any size
  • Branches with leaves
  • Iron wire
  • String Light
  • Decorations: Dry leaves, Pinecone, Preserved Cotton and so on.

Step 2: Step

  • Wrap the Grapevine wreath with leaves ( You can buy the grapevine wreath anywhere, you also can do it yourself)
  • Fix them with Iron Wire (It’s recommended to use thinner wires, you can hide it well)
  • Add some decorations and fix them.
  • Wrap the wreath with string light.
  • Completed!

Christmas Crafts Box for Your Friends

There may be times when you want to give someone a quick gift and do not have a box or gift bag on hand. No need to worry! You know what kind of gifts are the best ones? The answer is that the gift made by yourself. I like giving presents to my friends, which is made by myself.

If you want to give presents to your friend, this is a great choice! Now, let me tell you how to make this one. In this tutorial, I adopt a simple paper. To make this project more beautiful, you can choose to use colored paper. It’s super easy to learn how to make this Christmas gift box.

https://www.thevoguetrends.com/wp-content/uploads/2020/11/1544494117.mp4

Step 2: Print the design drawing from the Internet. You can download the following image to be convenient to make the Christmas gift box.

Step 3: Attach the design drawing to the colored paper and cut

Firstly, fix the design drawing paper on the colored paper. And then you need to cut out the pattern using a knife along the outside cutting line. To make the line look straight, using a ruler is very convenient to cut. In the process of cutting, please protect yourself from hurting. And then cut slightly using a knife to fold conveniently.

Step 4: Fold and fix the box

Fold the body of the box along the cutting line. Fix the tape on the bottom. Next, stick together. Now, it’s time to stick to the bottom. Fold the top part along the fold line

Materials:

  • Knife
  • Tape
  • Ruler
  • A piece of paper
  • Scissors
  • Printed design drawing
  • Colored paper

DIY Non-woven mini Christmas tree

Step 1: First non-woven cut into the fan shape.

Step 2: After the arc-shaped surface threading up, side sewn, and filled with cotton.

stich,fold, turn sides out

Step 3: Cut the cork in half, insert a suitable length of bamboo stick, or you can use a toothpick instead.

Step 4: Finally, sew them together, and add on the eyes, nose and so on.

Materials and tools:

  • Green non-woven
  • bamboo sticks
  • colored cotton
  • wine corks

Christmas Tree Ornaments

Step 1: We can make some small decorations for our Christmas tree

Perfect and easy way to make your own decorations at home. I made this lazy decorations for last winter. Share with you all this year. Hope you will like it or make some fantastic changes. Pls leave your comment if you have some idea.

Step 2: Cut the cardboard

Cut the cardboard into a round shape or hexagon pattern. Then cut out narrow blade along the edge using scissors. 

Step 3: Wrap the yarn, don’t be too deliberate

Wrap the yarn symmetrically along the narrow blade. Don’t be too deliberate. When weaving, we don’t need to be too deliberate. Just follow your own idea. If you are not satisfy with this pattern, just start it over. Make it on your own.  

Step 4: Using different weaving methods

If you want to make it in different patterns, just use different weaving methods. It is so easy to change the pattern by yourself. See how it looks ?  Is It fast to make and looks beautiful ? There gonna be some other patterns better than this one. Really want to hear you guys feedback ! 

Materials:

  • Cardboard
  • Colorful Yarn
  • Scissors

DIY Christmas Pendant

1: Prepare the material as shown in picture.

2: Cutting four kinds of fabric (refer to picture cropping).

3: Stitching in the order shown.

4: Center stitching completed.

5: Place these triangles around it.

6: Sew them together.

7: The back of the cloth is also sewn together.

8: Surface cloth and the back of the cloth opposite the front, plus some thin cotton, sew around the triangular, leaving the opening to return. From the back turned to the front, suture the opening.

9: Plus some small decorations.

10: Add sling and beads, Christmas pendant has been completed.

How to Draw an Elevated Christmas Tree

Learn how to draw a Christmas tree—it’s a festive way to spend the afternoon with your kids this holiday season.

Step 1: Draw a rectangle about 4-inches wide by 6-inches high. Draw an elongated triangle with a curved bottom lightly with a graphite pencil inside the rectangle.

Step 2: With a dark colored pencil, draw branches that follow the shape of the triangle.

Step 3: And the needles (the flat leaves) on the branches. Add in the trunk of the tree making it wider and the bottom skinnier at the top.

Step 4: Draw ornaments in circles and ovals on the branches.

Step 5: Add green color to the branches and brown color to the tree trunk. You can use watercolors, markers, or colored pencils.

Step 6: Color in ornaments with bright colors to make them pop against the green Christmas tree.

MATERIALS:

  • 1 graphite pencil (Faber-Castell Graphite Pencil Set, $18.29 for 12, target.com)
  • Colored Pencils (Faber-Castell Polychromos® Colour Pencil Tin Set, $34.99 for 12, michaels.com)
  • Paper
Categories
DIY Lifestyle

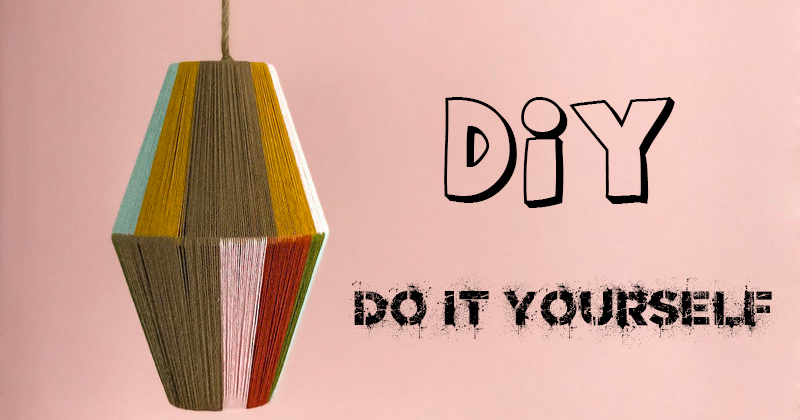
12 Awesome DIY Projects That You Know

Do you know what’s great about DIY projects? Here are 12 awesome DIY projects ideas to inspire you to get crafting and creative.

1. How to diy a pressed flower frame

There are two steps that you need to learn, then you’ll get a pressed flower frame.

Step 1: Prepare dried flower and glasses

Pick plants and flowers as you like. Fix them between two pieces of glasses. And clamp it with clamps.

Step 2: Make the frame

Binding glasses with hemp ropes.

Tips:

  • Strip excess foliage from flowers and cut stems to desired length (no shorter than six inches). To help flowers retain their color during the drying process, make sure to remove them from sunlight as soon as they’re cut. Hang flowers individually or rubber-band stems together to hang a bouquet.
  • Find a dark, dry area with good circulation, such as an attic or unused closet. With unflavored dental floss, secure the bottom of the flowers’stems to a hanger so that they hang upside down to dry. Leave flowers for two to three weeks until completely dry.
  • Remove flowers from hangers and spray with unscented hairspray for protection.

2. FLOWER PHONE CASE DIY

There are four steps that you need to learn, then you’ll get a flower phone case.

Step 1: Get your materials

Get your materials, and place these petals on the phone case.

Step 2: Pour into UV resin glue on the phone case

Step 3: Fix all petals

The glue spread out to ensure that each piece of petals are fixed, be careful not to leave air bubbles.

Step 4: Air drying

The phone case can be placed in sunlight for one day, let the glue natural coagulation.

Materials:

3. DIY Embroidery Thread Lampshade

There are three steps that you need to learn, then you’ll get a embroidery thread lampshade.

Step 1: Fix the two frame together with masking tape.

Step 2: Twine the embroidery thread around the frame up and down with different color of thread. But pay attention to the interval among every thread which you have twined.

Step 3: After the twine, add a hanging rope and put into a bulb which have install the lamp holder.

Materials and Tools:

  1. Scissor
  2.  Hemp Rope
  3. Masking Tape
  4. Drop light Suite
  5. Embroidery Thread and Bulb
  6. Lampshade Frame (two frame with the same diameter)

4. DIY Solid Wood Table Lamp With Square Shape Lampshade

There are five steps that you need to learn, then you’ll get a wood table lamp.

Step 1: Supplies and tools

Cut two of wood boards into 45-degree bevels assemble them with other two boards together using hammer and nails, finishing the color, drilling and installing one LED bulb lamp, fix it on the table using glue. Then you make it !

Step 2: Assembly lampshade

Cut two of wood boards into 45-degree bevels. Drill a hole which diameter is enough for a wire to pass on one of the rest two boards. Put two cut boards on opposite side with the rest boards. Make it into a square shape lampshade. Use hammer with wood nails to assembly the lampshade.

Step 3: Finish the color

Color wooden boards. Finish the color with your favorite one, vintage style are highly recommend ! Or you can choose the color suits for the table, or decorations in your home.

Step 4: Install the lamp

Prepare LED lamp, install the lamp through the hole.

Noted: Cut the wire before install the lamp through the hole and reconnect the lamp with its wire after installing. 

Step 5: Fix the table lamp

Use glue ( Resisto 850 ) to fix the square boards on the table. Stick just one side would looks better. 

Do you happy with your handmade table lamp ?  That’s it. Enjoy your new table lamp. 

Materials:

5. How to make a Cat Tree

I adopted a cat several days ago.As she grew up, she needed more space and activities, and it happened that I have a headache on how to deal with a bunch of accessories left under my house renovation. An inspiration suddenly ran into my mind why not make a cat tree for her ?So here we are!

Step 1: Step 1 Prepare work

First of all, you should make a simple design on paper and make sure that your design is based on your space where you will place it and it’s necessary to consider your cat’s personality, my princess Fluffy(her lovely name) likes jump up and down, climb here and there, so I determined to build a tall cat tree with perches,a little privacy room and hemp pillar stands.

I drew a really very simple design sketch,emm…well okay , I’m really not good at drawing. And then I list all the materials and tools I have and what I should to buy. Here is my checklist of stuff may be helps, if you want to have a try too.

Step 2: Step 2 Cut all materials to size and painted with varnish

Cut all the boards into sizes and shapes that you designed with the jigsaw .Drill the pattern of the kitten’s claws with a puncher and jigsaw ,this is the most strenuous step in the entire process,you need more patience to do it.

Then polished with sandpaper .

Varnished the board and dry them ,I varnished

 three times and be proved later that that’s really neccesary ,the surface is smooth and beautiful ,easy to clean and waterproof.

Step 3: Step 3 Cut the pipes into sizes and wrapped with hemp rope

Finally, 7 columns (length 25″), 2 columns(length 16″),1 column (length 32″) were cut out.

Seal the ends of the tube with a nail gun as the kitty condo’s climb stand.

After that ,wrapped the hemp rope onto the stands with a glue gun helps to make sure the rope is firmly attached to the column, to help prevent them been ruined by your kitty’s paw.

Step 4: Step 4 Make the cat roll perches

I saw off the bottom of an abandoned trash can, and then sewed a flannel cloth to make it warm and soft .

Praise my inspiration on your knees ,humanbeings !hahaha…

Step 5:Step 5 Assemble it !

Finally, the last step, very simple, use screws to assemble these parts!

Now,Please ,enjoy your time ,your majesty .

Categories
Lifestyle Tips & Tricks

How To Lace Golf Shoes

Unlike mastering the game of golf, there’s nothing too complex about learning how to lace golf shoes. Simple, basic and traditional Over Under Lacing and a bow tie knot will do the trick. It’s an efficient, comfortable and time-tested way to hit the links.

Tie them once and you should be good to go for an entire round of 18 holes. However, there’s a chance that you, like many people, don’t tie a proper bow tie knot. So, if your laces keep coming undone as you’re on the approach, then be sure to check out the tip below.

LACING INSTRUCTIONS

When you’re learning how to lace golf shoes, follow these steps:

OVER UNDER LACING

Step #1
Start by threading your shoelace through the bottom eyelets until you have an equal amount of shoelace on each sid

Step #2
Thread the left and right laces across to the next eyelets, creating a diagonal “X” pattern. Continue pattern all of the way up.

Step #3
Take both laces, thread them and pull tight. Next, take the classic bunny-ear loop in one hand and wrap the other lace around the loop back towards you – rather than away from you.

Step #4
Pull loops tight. The bow should be straight across and perpendicular to the direction of the shoe.

You May Also Like:

Categories
Lifestyle Tips & Tricks

How To Lace Running Shoes

Before finding your stride, it’s important to know how to lace your running shoes specific to your gait and foot width. This step is especially valuable in lowering your risk of injury, not to mention chafing and blistering.

There are many methods but these six are the most common: Lydiard lacing, gap lacing, wide foot, narrow foot, diagonal lacing and runner’s loop (also known as heel-lock lacing). Each style offers a different level of support and comfort, so test them out and find what’s best for your foot.

In the end, this is how your running shoes should fit and feel 1) snug in the heel and midfoot with a little bit of wiggle room in the toes 2) when holding the shoe’s heel and raising your foot, there should be little to no movement 3) top eyelets on each side of the tongue should be parallel 4) tight fit that still offers comfort for reduced impact and increased stability.

LACING INSTRUCTIONS

When you’re learning how to lace running shoes, follow these steps:

LYDIARD LACING

Developed specifically to increase blood circulation to distance runners’ feet by relieving pressure. A helpful style if your shoes feel tight or binding.

lace running shoes

Step #1
Start by threading the lace through the bottom eyelets until there is an equal amount of lace on either side of the shoe.

Step #2
Run the left lace straight-up the inside of your shoe to the second eyelet, then lace straight across.

Step #3
Run the right lace straight-up the inside of your shoe to the third eyelet, then lace across.

Step #4
Continue this pattern of skipping eyelets and running the laces up through the inside of the shoe and straight across through the adjacent eyelet until complete. Finish with standard bow tie.

GAP LACING

This style is named for the “gap” in the middle of the shoe which accommodates high arches. It also increases ankle flexibility for trail runners or could be used to avoid a sensitive area. Note: The gap should be positioned wherever needed but the steps below outline directions for a high arch gap in the middle of the foot.

lace running shoes

Step #1
Thread the lace through the bottom eyelets until you have an equal amount of lace on each side.

Step #2
Thread the left lace through the right eyelet and the right lace through the left to create a diagonal “X” pattern. Continue pattern until you reach the area of your foot that needs more room.

Step #3
Run the right and left laces straight up the inside of the shoe for one or two eyelets, depending on how much room you need to create a gap.

Step #4
Return to the crisscross or “X” pattern lacing above the gap until complete and tie laces into a bow knot.

WIDE FOOT

Designed to open up the front of the shoe to create more space for wider feet or extra breathing room for runners. Note: The example below creates extra space up to the third eyelet, but it can be made as large as needed.

Step #1
Lace the bottom eyelet(s) until you have an equal amount of lace on the left and right.

Step #2
Run the right and left laces along the inside of the shoe and into the second eyelet. Then repeat this step to the third eyelet, giving you plenty of room in the front of the shoe.

Step #3
Begin lacing as you normally would in a diagonal “X” pattern with the right lace crossing to a left eyelet and the left lace crossing over to a right eyelet.

Step #4
Continue the “X” pattern all the way up to the final eyelets and tie the laces.

NARROW FOOT

Is your foot sliding around inside your shoe? Are they laced up tight and still not tight enough? If so, there’s a good chance you’ve got narrow feet and need a lacing style that’s a little more snug.

Step #1
String the lace through the bottom eyelet, until the length of the left and right shoelaces match.

Step #2
Thread the right and left laces back and forth in a traditional crisscross “X” pattern. Continue until you reach a middle eyelet.

Step #3
Skip a middle eyelet, leaving them empty, and resume the crisscross pattern on the next available eyelet.

Step #4
Continue the crisscross pattern all the way up and tie the laces off at the top of the shoe.

DIAGONAL LACING

Having a bruised big toe or sore toes after a long run is a common problem experienced by runners. This technique alleviates pressure and pain points by lifting the toe cap on your shoe to free your toes and gain natural motion of your foot.

Step #1
Start with one end of the lace in the top eyelet, leaving enough lace to tie still your shoe, then run it diagonally down to the bottom eyelet above your big toe. Note: The diagonal lace will be mirrored on the opposite foot.

Step #2
From the bottom eyelet next to your big toe, thread the shoelace to the opposite bottom eyelet.

Step #3
Next, thread the lace diagonally across to the next open eyelet. Then thread it straight across to the opposite side and through the adjacent eyelet.

Step #4
Continue stringing the shoelace, diagonally into the next available eyelet and straight across to the adjacent eyelet until reaching the final eyelet. Finally, tie the laces together at the top of the shoe.

RUNNER’S LOOP

Runner’s Loop or heel-lock lacing is an incredibly common technique for runners because it creates a super-tight finish that prevents your heel from slipping. For trail and/or long-distance runners, this style is an extremely helpful way for your shoes to stay tight even while running on uneven surfaces.

Step #1
Create an equal amount of shoelace on the left and right side of the bottom eyelet.

Step #2
Take the left lace across to the next available right eyelet and the right lace across to the next left eyelet in a diagonal “X” pattern. Continue crisscrossing the laces until the top two eyelets.

Step #3
Before the final eyelets, take each lace directly up to the eyelet above on the same side of the shoe – threading from the outside-in to create a loop.

Step #4
Run the laces straight across and through the adjacent loop; pull tight to lock your heel as you tie the laces into a simple bow as you normally would.

You May Also Like:

Categories
Lifestyle Tips & Tricks

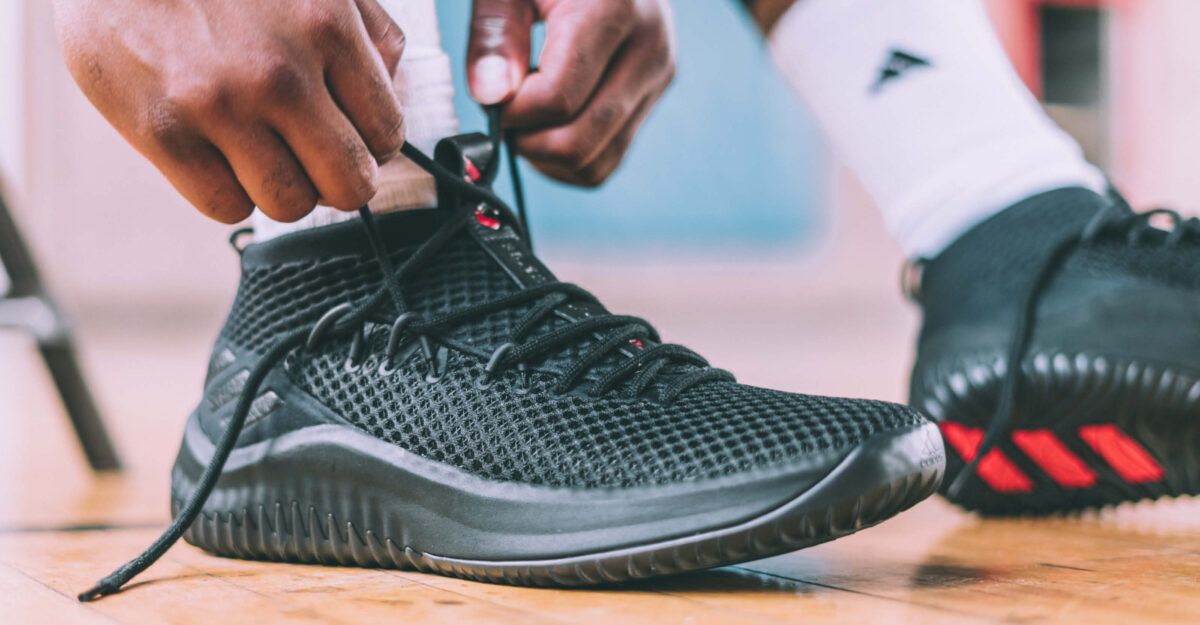
How To Lace Basketball Shoes

Knowing how to lace basketball shoes specific to your arch can be a game-changer in dominating the court. It’s a final check to know your style is on point starting from your feet up, and to ensure you’ve got head-to-toe handles like a certain point-god whose uncanny control and otherworldly movement calls for locked down lacing.

From left over right to right over left, to different tensions and various ties, laces let you curate your fit and control your style, giving you James Harden-esque possession of your own unconventional creativity. Wear them tight for more control or loose for more comfort and less constriction on high arches – it comes down to your style, your feet and what works best for you.

LACE BASKETBALL INSTRUCTIONS

When you’re learning how to do it, follow these steps:

CRISSCROSS LACING FOR HIGH ARCHES

Basketball is lightning fast with players racing up and down the court at breakneck speeds before stopping and cutting on a dime. These quick stop-and-start movements can place an excessive amount of strain on feet with high arches, leading to severe pain and instability. Make sure you’ve got the support you need when you’re hitting the hardwoods with this high-arch lacing style.

Step #1
Start by threading the lace through the bottom eyelets until there is an equal amount on either side of the shoe.

Step #2
Thread your left lace through the right eyelet and right lace through the left eyelet, creating a crisscross “X” pattern. Continue this pattern for the next two eyelets.

Step #3
At the center of the shoe, skip two or three eyelets.(whichever is needed to remove pressure on the top of your arch and offers the most comfort). Then return to the crisscross “X” pattern of lacing at the fourth. and or fifth eyelet and continue until you reach the top.

Step #4
To ease pressure on the bridge of your foot, tie and tuck the laces behind the tongue.

CRISSCROSS LACING FOR LOW ARCHES

Having low arches or flat feet can be an advantage on the court or a burden. On one side, they’re more flexible and lower to the ground allowing quicker cuts and freer movement. On the other side, the impact from every rebound, layup and jump builds up over time causing sore feet, strained arches and heel pain. But with this lacing style, your heel will be locked down, so you can stay in the game.

Step #1
Start by stringing the shoelace through the first eyelets until you’ve got an equal amount of lace on each side.

Step #2
Thread the left and right laces back and forth in a familiar crisscrossing “X” pattern all the way up the shoe until the last two eyelets.

Step #3
Next, take each lace up to the final eyelet directly above – instead of crossing. Once you’ve threaded these last two eyelets, leave a loop and don’t pull tight.

Step #4
Finally, cross the laces once more by threading the left lace through the right loop and the right lace through the left. Pull tight and tie in a double knot (this results in a tighter feel and a locked heel). Tuck in the bow or keep it short to prevent tripping.

You May Also Like:

Categories
Lifestyle Tips & Tricks

How To Lace Cleats

From youth sports to amateur and professional levels, it’s important for every athlete to know how to tie cleats with a Lock Lace for their best fit. This style modifies a traditional crisscross lacing or “X” pattern to make a serious impact on your comfort, safety and performance on the pitch, the diamond or the gridiron.

Finding the fit for your game comes down to two factors: the perfect tightness and freedom of motion. Take control of your style by giving yourself 20 minutes to lace up and test your cleats before playing so you don’t have to make adjustments on the fly. Get your lacing locked down and you can play locked in.

LACE CLEATS INSTRUCTIONS

When you’re learning how to do it , follow these steps:

LOCK LACING

Step #1
First, string the lace through the bottom eyelets and create an even amount of shoestring on the left and right sides.

Step #2
To create a common crisscross and “X” pattern, take the left and right laces diagonally across each other to the open and adjacent eyelet. Work your way up to the final two eyelets.

Step #3
Instead of crisscrossing the laces, run each lace up the same side into the eyelet above, threading from the outside of the shoe to the inside, creating a loop.

Step #4
Cross the laces and run them through the adjacent loop. Pull tight and tie cleats as you normally would (for example: bow tie knot).

Step #5
Tuck any remaining or extra lace slack into the empty space between your ankle and shoe.

You May Also Like: